Over the past few years I’ve been asked to have a go a fixing many a gadget so last week when a good friend as if it was possible to fix his Huawei P8 which has taken a beating, my default answer was “sure, let see how much the screen is”. So after some googling it was about £30 for a replacement part (Glass, LCD and Frame). The advantage to getting the screen with frame is its then just a case of transplanting components from old to new and job done, instead of heating glue, cleaning, sticking etc. This was the case with my brother Moto 4G phone.
general specs of the phone are below and its clear to see this phone is clearly worth saving from the bin
Display 5.20-inch
Processor 2GHz octa-core
Front Camera 8-megapixel
Resolution 1080×1920 pixels
RAM 3GB
OS Android 5.0
Storage 16GB
Rear Camera 13-megapixel
Battery Capacity 2680mAh
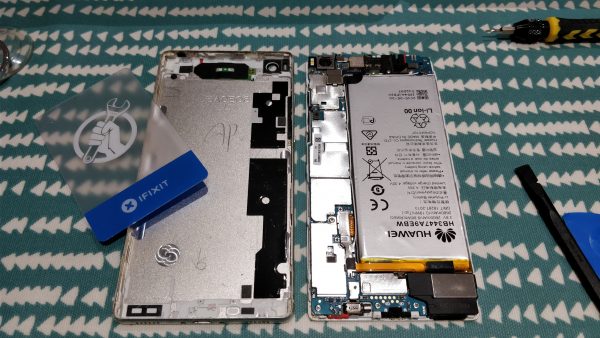
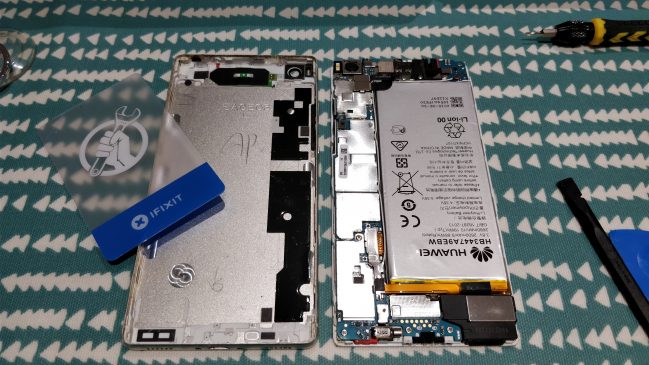
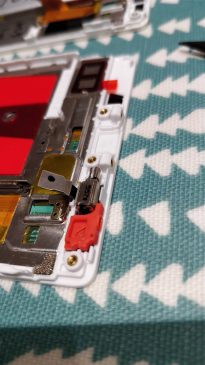
The Huawei P8 to break apart was straight forward enough BUT everything is on the screen, speaker, mic, cameras, battery, vibrator etc etc. I was in for a treat 😀
so the steps I followed are as follows… its not for the faint hearted and has lots of glued parts and pogo connectors that can easily be broken off.
HOW TO…
Remove the trays for the SD card and the SIM card
Unscrew the two Pentalobe P2 screws located at the bottom
Use a suction handle to separate the display unit from the rear pane
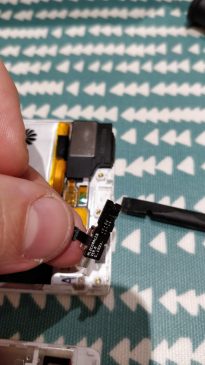
Use a tweezer to remove the metal clamp covering the display and the battery flex connector. Unplug the battery flex connector.
Remove the metal clamp covering the flex connector of the front camera

Unplug the headphone jack and the front camera flex connectors
Remove the front camera.
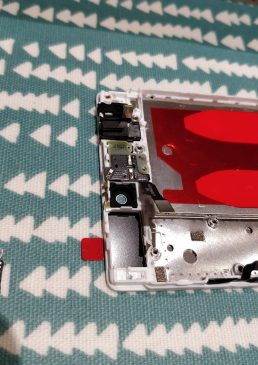
Unscrew the four Phillips #000 screws that hold down the motherboard of your Huawei
Unplug the vibration motor flex connector.
Disconnect the antenna cable
Unplug the display flex connector from the main board
Disconnect and remove the antenna cable with a tweezer
Use a spudger to disconnect the flex cable of the power and volume buttons
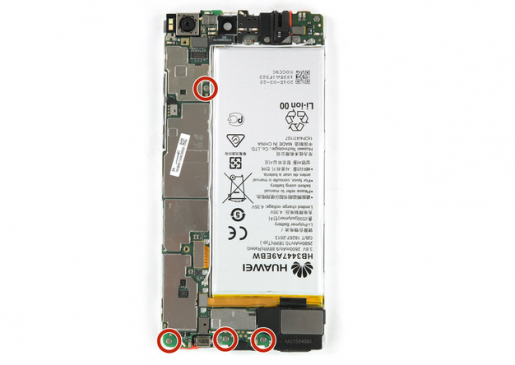
Remove the liquid contact indicator that sits on top of the last screw holding down your main board. Unscrew the Phillips #000 screw
Lift up the main board with a spudger and remove it
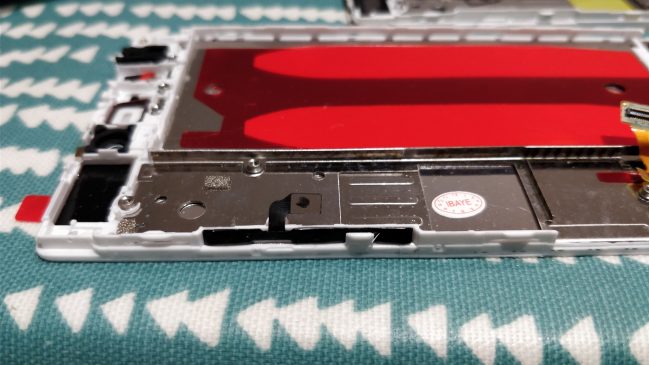
Loosen the flex cable of your loudspeaker carefully. If it is too sticky loosen the adhesive of the whole loudspeaker assembly.Lift up the loudspeaker assembly with a spudger and remove it.
THIS PART I DIDNT and popped the battery so do as I say now, not as I did 😛 The new battery was £8 from Amazon so not the end of the world (just a really strong smell of chemicals)
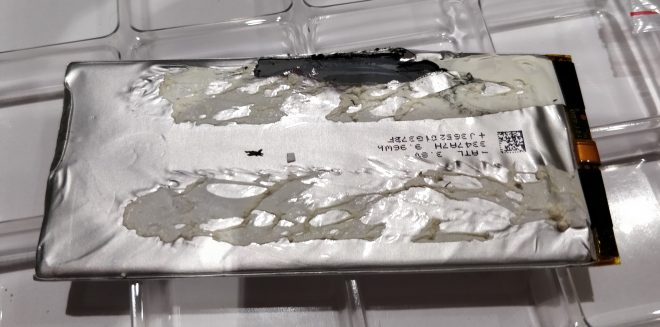
Free the end of the first adhesive pull tab to get a good grip on it,Pull the adhesive tab in a slow constant movement to free the battery, repeat on other tab.
Remove the vibration motor gasket. Remove the vibration motor.
Remove the power and volume button flex cable.
Remove the four Phillips #000 screws at top of unit holding earpiece, head phone jack etc. Use a tweezer to remove the plastic bracket which is covering the corner of the headphone jack.
Remove the gasket which was placed under the daughterboard in the top right corner of your phone
Remove the earpiece speaker with a tweezer. Take care of its connectors while doing so
Remove the front camera gasket.
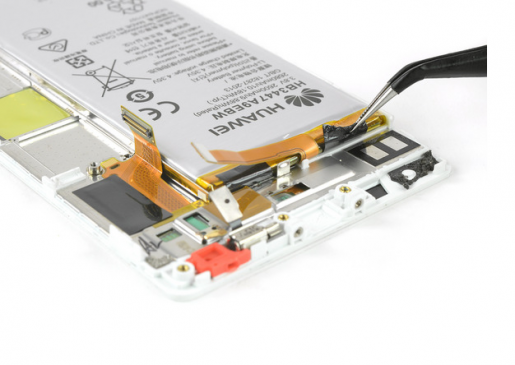
Once have done all of that you have to install them on the new screen/frame. I just reversed the able instructions. Again I would have to say this is more involved then an iPhone screen replacement. Popping the battery didnt help either but once I installed it and close the phone up it was back up and running with new screen and new battery.